
Then you pour the mix into the molds.

Wait about 5 minutes, then use a paper tower to draw off some of the pooling water. This is followed by scraping the mold. There is always some excess, and I do my best to recover as much of it as possible. Usually this means extra floor tiles.
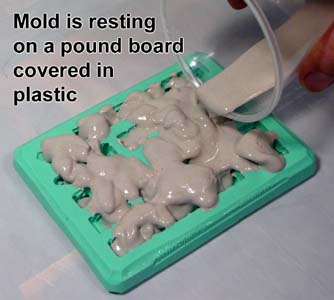 |
| Picture from hirstarts.com |
Then you wait some more for the brick to dry. Since I’m doing my casting at night before bed, these bricks won't be ready till the next day. However I took pictures of the previous day’s bricks.

With the plaster I’m using (Excalibur dental plaster - way stronger than plaster-of-paris) you can generally de-mold the bricks after about 30 minutes.
Once the bricks are demolded, you need them to dry completely before you use them. I’ve got a dehumidifier running in the basement, and I lay them out on newspaper, so they tend to dry quickly. A day or two in dry conditions tends to be enough.
Don't forget to vote on my Halloween poll!

I use a dehydrator, which most people would use for making dried apple slices or banana chips. It has 5 or 6 trays which stack and then you put the lid on. You can fit four molds worth of tiles on one tray.
ReplyDeleteI find that with dental plaster, it sets up faster but takes longer to cure to "buildable hardness" compared to plaster of paris. So bricks that have been in the dehydrator for 2 days are just bone-dry and awesome.
Please keep your plaster in small plastic tubs with lids, and put a dessicant packet in there too. Your plaster will spoil and you won't be able to get it to harden if it does. I bought a 50-lb bag of dental plaster (cheap too!) and halfway through it went bad because I just left the whole thing sitting out. Instead, I should have parted it out into 10-lb or 25-lb tubs.
Where do you get the molds? I've looked for awhile and never found those types of Hobby supplies.
ReplyDeleteUndoubtedly, I have been searching in the "wrong places."
Looks awesome!
Not sure if this is what you are doing or not, but be sure not to pour directly into a cavity. Let the plaster slowly run into the cavity and push the air out. Helps with air bubbles.
ReplyDelete@1d30 Good idea about the tub! Unfortunately I don't have a dehydrator, otherwise I would totally use it to dry my blocks!
ReplyDelete@Mystic Scholar - Direct from Hirstarts.com You can also get them from his stall at GenCon if you ever go.
@Kiltedyaksman - I usually pour from about 3-4" above the mold, onto the edge next to the cavity, and let it flow down. Still get some bubbles. Probably doesn't help that I'm not really vibrating the table after I pour either.
I found that just beating the work surface works to bring bubbles to the surface. It also really helps to use the more complex mold prep method:
ReplyDelete1: knock and wipe the mold (gently) to get most of the plaster off.
2: wash the mold with water to get any leftover plaster off
3: dip the mold in a solution of Jet Dry (or whatever) and water, running your fingers through the mold to squeeze out any bubbles
4: pull out of the solution and pat mold face-down against a towel to get rid of most of the solution (don't put your fingers in the mold!). set molds face-up atop wax paper to catch spills.
5: mix plaster (not too thick!) and pour into center of each mold-block
6: pound work surface to get bubbles to come up, and pop them with a tothpick or the edge of your paint scraper.
7: wait until the mold responds to the "pound test", that is, the plaster in the mold doesn't wallow around like liquid when you pound the work surface. usually only a few minutes with dental plaster.if you find you get a lot of water formation on top you might be using too little plaster powder.
8: scrape with the paint scraper, not taking everything off with the first scrape, and moving some plaster around to fill in iff you scraped off too much. Get it even with the top of the mold.
9: you scraped plaster off the mold onto the wax paper. wait to demold until the scrap plaster responds to the "poke test", that is, poke the scrapings and when it doesn't nudge in you can demold.
10: place demolded blocks somewhere dry and not touching each other or stacked.
11: wash mold as in 1-2
12: the blocks are ready to be glued when they feel dry and light and are lightly colored. Keep a bone-dry block from your early batches as a color test to check later batches against.
if your blocks can't dry, your plaster might have gone bad. keep the plaster powder dry, preferably in separate plastic containers with a packet of dessicant. it might also be too little powder in your mix, too little time spent setting before demolding, or a too-humid environment, or a too-cold environment. water contamination is unlikely if this is potable drinking water you use in your mix.
if your blocks break when demolding or otherwise lack strength, maybe use more plaster in the mix. you already use dental plaster, so there isn't much better you can use.